PROBLEM: DRY BREAST MEAT
CAUSE: White meat. Chicken is lean, especially the breast meat, which tends to dry out.
SOLUTION: Brine, the rinse.
1. BRINE

To brine 4 pounds of chicken, dissolve 1/2 cup table salt in 2 quarts of cold water in large bowl. Add chicken, cover bowl, and refrigerate for up to 1 hour. The brine also flavors the meat.
2. RINSE

After you've brined it, rinse the chicken well to remove excess salt. The salt has already done its job, changing the molecular structure of the meat to help it retain its juices when cooked.
PROBLEM: STICKING SKIN

CAUSE: Moisture. Wet skin sticks to the grill. And if the grates are dirty, forget about saving the skin.
SOLUTION: Dry skin, oil grate.
1. BLOT DRY

Shrink-wrapped packaging makes chicken skin very wet. Brining and rinsing make matters worse. Blot the chicken dry with paper towels before cooking it.
2. CLEAN GRATE

Brush the hot grill grate clean. Next, dip a wad of paper towels in vegetable oil and use a pair of long-handled tongs to grease the clean grate.
PROBLEM: FLABBY SKIN
CAUSE: Anxiety. Sure, indirect heat is safe (no towering infernos), but it won't ever get that crisp skin.
SOLUTION: Render, then sear.
1. START LOW

Arrange the chicken skin-side down on the cooler side of the grill. Cook, covered, until the fat has rendered and the skin is crisp and golden, about 20 minutes.
2. GO HIGH

Move the chicken to the hot side of the grill, and continue to cook, turning occasionally, until both sides are well browned and the white meat registers 160 degrees (175 for dark meat).
PROBLEM: CHARRED SKIN

CAUSE: Twofold. The fat drips down and causes big flare-ups, or sweet sauces burn.
SOLUTION: Grill, the glaze.
1. TAKE TEMP

Only when the chicken is nearly done (150 degrees for white meat, 165 for dark) it is ready to glaze.
2. GLAZE LAST

BREAKING DOWN A CHICKEN, MAKING PARTS
It may seem intimidating, but carving a whole roasted chicken isn't difficult. Here are the step-by-step tips you'll need to make this task effortless every time.
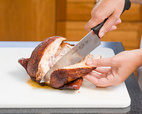
STEP 1

Cut where the leg meets the breast, then pull the leg away. Separate the joint by pressing the leg out and pushing up on the join, then cut through the joint.
STEP 2
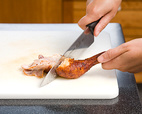
Cut through the joint that connects the drumstick to the thigh. Repeat on the second side to remove the other leg.
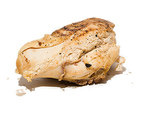
STEP 3
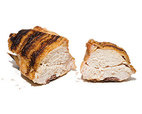
Cut down along one side of the breastbone, pulling the breast meat away from the bone as you cut.
STEP 4
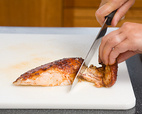
Remove the wing from the breast by cutting through the wing joint. Slice the breast into attractive slices.
Không có nhận xét nào:
Đăng nhận xét